Installing a SCSI (Small Computer System Interface) adapter card is a process that requires careful attention to detail. By following these steps, you can ensure a successful installation whether you are upgrading or setting up a new system. Below are the comprehensive steps required for the installation.
Step-by-Step Guide to Installing a SCSI Adapter Card
1. Preparation
Before diving into the installation, make sure you have all the required materials and a clear understanding of your system’s specifications.
- Identify Slot Type: Confirm that your motherboard has a compatible slot (usually PCI or PCIe) for the SCSI adapter card.
- Gather Tools: A Phillips head screwdriver, anti-static wrist strap, and the SCSI adapter card with its drivers and cables.
- Backup Data: Back up your data to prevent any data loss. This is especially crucial if you are upgrading your current system.
2. Opening the Computer Case
Turn off your computer and unplug it from the power source. Remove the case cover by unscrewing the screws or releasing the latches that hold it in place.
Steps:
- Place the computer on a flat surface, preferably on an anti-static mat.
- Wear an anti-static wrist strap to avoid damaging components with static electricity.
- Locate the expansion slot that you’ll use for the SCSI adapter card.
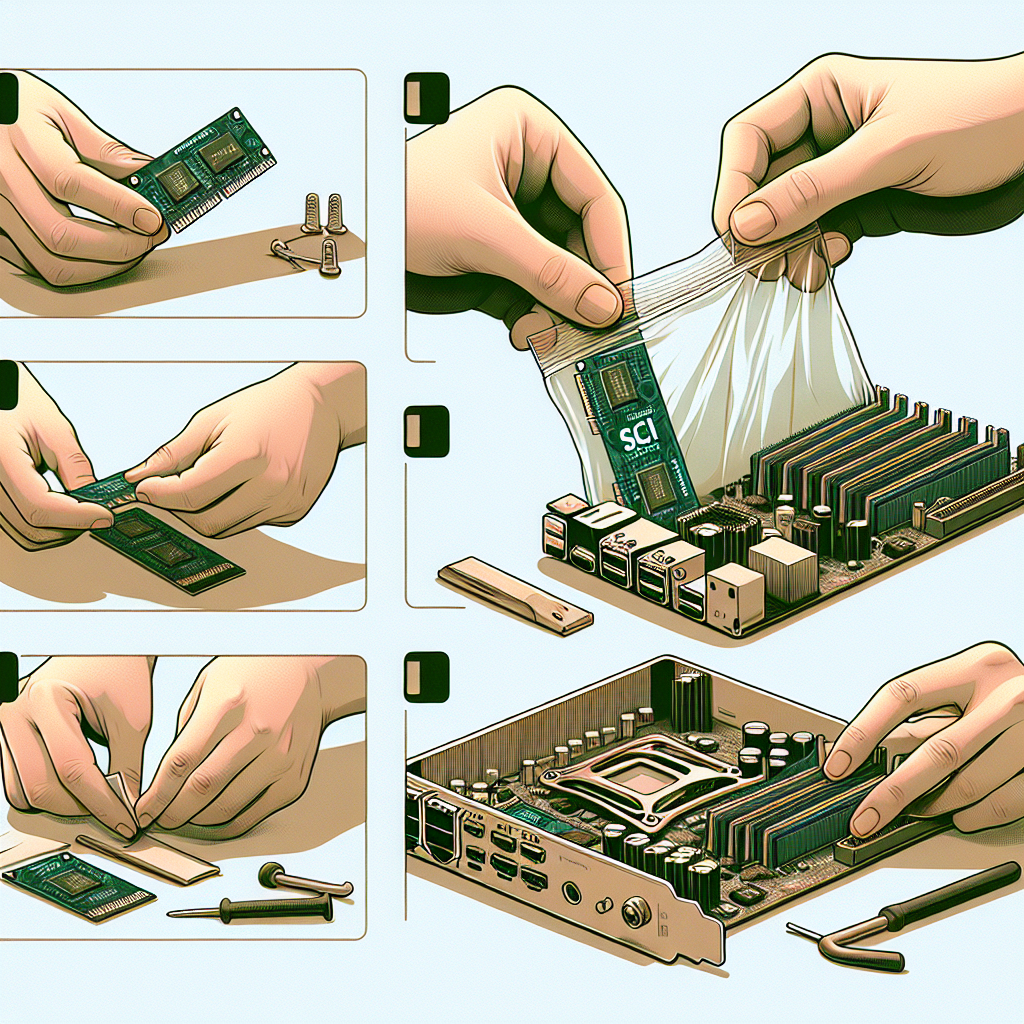
3. Inserting the SCSI Adapter Card
This is the core step of the installation process. Carefully insert the SCSI adapter card into the selected slot.
Steps:
- Gently align the card with the slot.
- Press down firmly but gently to seat the card fully into the slot.
- Secure the card with a screw or latch to keep it in place.
4. Connecting SCSI Devices
Now connect the SCSI devices to the card using the provided SCSI cables.
Steps:
- Identify the type of SCSI connection your devices and adapter card support (e.g., 68-pin, 50-pin).
- Carefully connect the SCSI cable to the adapter card and then to the peripheral device, ensuring a secure fit.
- Terminate the SCSI chain if necessary. Usually, the last device on the SCSI chain requires termination to maintain signal integrity.
5. Closing the Computer Case
After the hardware installation is complete, close the computer case.
Steps:
- Carefully put the case cover back on and secure it with screws or latches.
- Ensure all cables and wires are tucked away to prevent obstruction.
6. Powering Up and Installing Drivers
Reattach the power cable and turn on your computer. Install the necessary drivers for the SCSI adapter card to function correctly.
Steps:
- Boot up your computer and enter the BIOS/UEFI setup to detect the new hardware if necessary.
- Insert the driver CD that came with the SCSI adapter card or download the latest drivers from the manufacturer’s website.
- Follow the on-screen instructions to install the drivers.
7. Final Configurations
Make sure everything is correctly set up and that the SCSI devices are recognized by your operating system.
Steps:
- Check the Device Manager (Windows) or equivalent on your OS to see if the SCSI card and connected devices are recognized.
- If the devices are not recognized, troubleshoot by checking cable connections and ensuring the drivers are correctly installed.
- Update the firmware of the SCSI adapter card if required. Some advanced SCSI cards may require firmware updates for optimal performance.
Common Issues and Solutions
Despite careful installation, you may encounter some issues. Here are common problems and their solutions:
| Issue | Solution |
|---|---|
| Devices Not Recognized | Ensure proper cable connections, check driver installation, and verify BIOS/UEFI settings. |
| Computer Won’t Boot | Check if the SCSI card is properly seated and all components are securely connected. |
| Data Transfer Errors | Ensure SCSI termination is correctly done, update drivers/firmware, and check for loose connections. |
Why Choose SCSI?
SCSI offers several advantages, making it a popular choice despite its complexity:
- Fast Data Transfer: SCSI supports high-speed data transfer rates.
- Device Flexibility: It allows multiple devices to be connected on a single bus.
- Reliability: SCSI is highly reliable for both consumer and enterprise applications.
Conclusion
Installing a SCSI adapter card can be slightly more complex than other expansion cards, but by following these steps, you can achieve a successful installation. Always refer to the manufacturer’s documentation for your specific hardware and ensure all precautions are taken to protect your computer’s components. Happy installing!
Leave a Reply